
DIFFICULTY: INTERMEDIATE | TIME: 4–6 HOURS
MARKET VALUE INSIGHT:
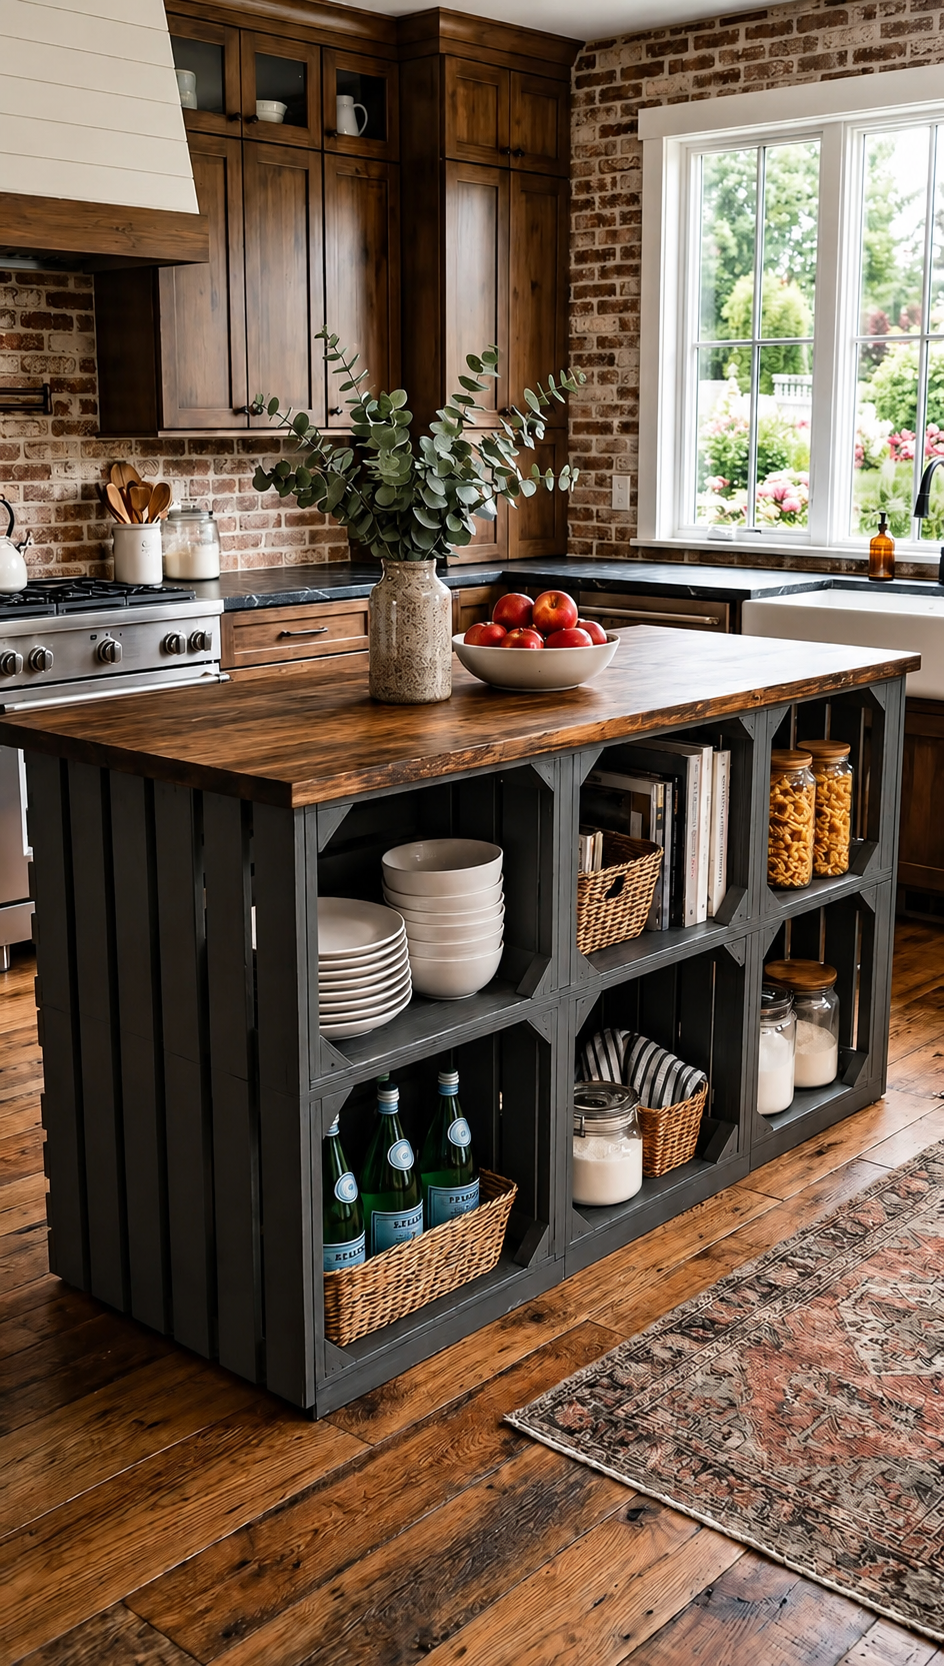
High-end kitchen islands like this usually fetch between $500–$1,000 in boutique shops. By building this yourself, you get that premium, custom look for a fraction of the price.
WHAT YOU’LL NEED:
Wooden Crates: 6–8 pieces, depending on how big you want your island.
Countertop Slab: Go for a solid, pre-sanded board to give it that professional finish.
Wood Glue: Essential for holding everything tight.
Wood Screws: These will keep your crates and countertop rock-solid.
Tool Kit: Grab your drill, glue gun, tape measure, and some sandpaper to smooth out the edges.
HOW I BUILT IT:
1 Layout: Start by arranging your crates on the floor until you find the perfect footprint for your kitchen.
2 Structural Base: Screw the crates together side-by-side; make sure they are aligned so the whole structure stays stable.
3 The Surface: Apply the wood glue evenly across the top, then place your countertop slab carefully.
4 Locking it down: Secure the countertop by driving screws up through the crates into the slab from underneath—keep it hidden for a cleaner look.
5 Final Touch: Do a quick check for levelness, sand down any rough spots, and stain or paint it to match your vibe.
PRO-TIP:
If you want to be able to move your island around, install heavy-duty locking casters on the bottom. It makes cleaning and re-arranging your kitchen space so much easier.